Human Anatomy Made Fun
Science is probably one of the most challenging subjects I teach to my children. There’s so much information to cover, and I strive to keep it engaging and easy to understand for the elementary ages. Out of all the topics we’ve covered, human anatomy took the most preparation on my part, but ended up being one of our best studies. The kids still talk about it even though it was several years ago. This year I’m planning to redo the study with my two youngest, and thankfully I had compiled everything we did on a retired blog. I’m re-blogging it here and hope it will be a blessing to others.
I also intend to include my two oldest children. Not only, does that give them the opportunity for review and a chance to teach the younger kids, but they will also get a more in depth study. At the bottom of this post, I will include some teen resources as well.
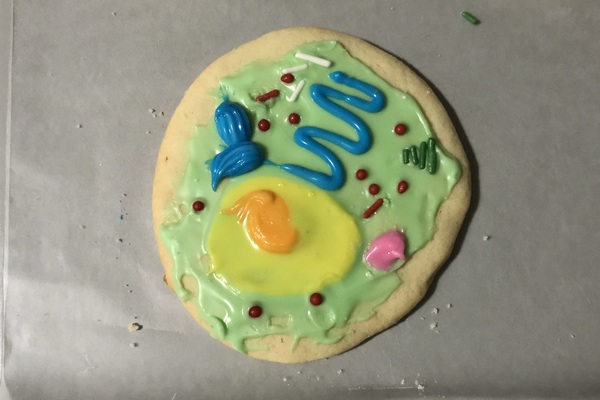
We began with studying the human (animal) cell.* Since our last series of lessons had been on plant life, we compared the animal cell to the plant cell. You can download free science worksheets from Superstar Worksheets. I like their pages because of their simple layout. We used the worksheet as a model for human cell sugar cookies. The kids had a blast with this, and it really turned a difficult and somewhat abstract topic into a lot of fun. Teens will enjoy this activity too! We also watch this video on the cell. I will include a full list of videos on human anatomy at the end, but the ones like this one that are specifically “made for kids” will not appear. (YouTube won’t allow you to save “made for kids” videos onto playlists.)
*For teens, you may want to cover DNA and genetics before going into the next section.

Next we discussed how human life begins. I found these free printable cards on life in the womb here and used them to make a simple folder game. We watch this very beautifully put together video: Conception to Birth by Alexander Tsiaras. It begins at the 2:00 mark if you want to skip the introduction.
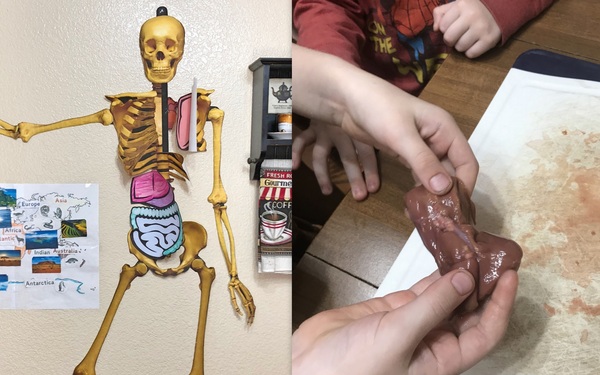
We studied the human skeleton next. In preparation for this, I found a free life-size printable of the human skeleton. It was a bit of work to put it all together, but it was definitely worth it. We named him Mr. Skeleton and hung him in our homeschool room (i.e. dining room). He remained up for the duration of the year. It made my dining room look like it was decorated for Halloween all year long, but Mr. Skeleton was a big hit with the kids. I found this great video for the bones in the skull, and this interactive game for learning the names for the bones. For more videos, see my playlist. And excellent notebooking pages here.

Last time we ended up doing the muscular system last. This year I plan to bump it up to right after the skeletal system as our muscles and skeleton worked together. You can watch this fun kids’ video on how our bodies move. The kids played an online game Poke-A-Muscle. We did this fun project—making a robotic hand. You can get instructions for it in the Mystery Science lessons “Why Do Your Biceps Bulge.”

We made a brain hat for studying the brain, which you can get here. And a brain folder game from here.
We watched this video on the nervous system, and the kids labeled a neuron worksheet found here. Build a neuron using pipe cleaners from instructions found here. We discussed how the nervous system controls our senses, and I had the kids try to guess how many senses we have. We have a lot more than the typical five that usually comes to mind, like balance or the sense that allows us to know where each of our body parts are without looking. A good article for you to read in preparation for the senses can be found here.

For the sight and sound we watched these videos here and here. We took the time to learn a little about Helen Keller and watched this short clip here. This is also a good time to talk about the sense of balance and we watched this video here. We watched “The Science of the String Phone!” and made a paper phone—first using string and a second using yarn to see which worked best.
For taste and smell we watched these videos here and here. We gathered several different scents. I blindfolded the kids, and they had to guess what it was using their nose. We did another test using food items with similar texture (like a vanilla cookie & chocolate cookie), and the kids had to guess which was which based on taste. We repeated the test with each child plugging their nose while tasting.
After this, we watched an old Disney video on the sense of touch followed by a lesson on the integumentary system. We color coded this worksheet, and I put the kids’ fingerprints on paper so they could study the ridges. This creepy video of all the bugs that cohabitate on our body was a good fit for this portion of human anatomy.

After the nervous system, we talked how our body makes blood. You can download this free worksheet here. We made a magnified drop of blood, and each of the kids used it as a model to draw and label their own drop of blood.
Drop of Blood:
Red Blood Cells – Small red beans
White Blood Cells – White navy beans
Platelets – Split peas
Plasma – Corn syrup
You can watch this set of three, slightly odd but informative, cartoons on blood cells here. And a more serious video here on blood platelets.
The digestive system was by far the favorite part of human anatomy for obvious reasons—it’s gross. We downloaded the Food to Feces activity here. The kids really loved this. It has a free printable of the digestive system along with a little ship. The idea is you have been shrunk very small and our taking a journey through the digestive track. The ship is placed on the part of the digestive track you are studying that day. For an actually real-live journey through the digestive track, you can watch this video here of a dude that swallowed a pill size camera. I do not recommend watching this before lunch.

As we went through each of the major organs of the human body, we added life-size organs to Mr. Skeleton. You can find the free pintables here. I let the kids study the organs of a chicken and compare the similarities to our own. Make sure they wash their hands afterward! Again, we used the pintables from homeschoolclipart.com as we went through each of the organs. Here’s a video on the respiratory system. The kids really like this video of a cow lung attached to a leaf blower.

So let’s talk about teens. One of the best ways to learn is to teach. Get the teens involved in helping the younger kids with their projects. You could also assign the teens a presentation or project to share with the younger children. If they don’t have younger siblings, they can always share it with other members of the family.
Finally, CK-12 offers a free high school level course of biology, and includes study guides and suggested videos.
For a list of videos, you can also see Human Anatomy playlist on my channel.
Check out Homeschooling the Dyslexic Child, written by a good friend and fellow homeschooler.
Thank you for reading. Keeping a blog going, though fun, is a lot of work. If you found this post helpful, consider buying me a cup of coffee. If you haven’t already, you can subscribe for more posts like this one below.
Happy Homeschooling!

